PHPKB Knowledge Base Software - Installation Tutorial
Estimated Reading Time: 3 MinutesPHPKB knowledge base software is extremely easy and straightforward to install. You just need to upload the files from the archive, navigate to the URL, and follow the installer. In this tutorial, we are going to cover the installation step by step.
System Requirements
In order to make sure your server meets the requirements for installing PHPKB knowledge base software, please refer to the System Requirements page on our website.
Unzipping Contents
After purchasing the PHPKB knowledge base software from our site, you will receive an email with your license key along with a download link to a zip file containing the script files. The first step is to unzip (extract) the archive somewhere on your hard drive. You end up with a "phpkbv9" folder, which contains the files and folders of our knowledge base software.
Uploading
You need to upload the contents of the phpkbv9 folder somewhere on your site. For the purposes of this tutorial, we will assume that you chose to upload the contents to http://www.domain.com/kb/, however, any path will do. You can upload the contents to a separate subdomain or a subfolder. It is only important to make the address descriptive, as this is the URL that is going to be visible to your visitors.
For uploading the folder to your hosting account, you can use any FTP client.
Installation Procedure
To start up the installation, you need to navigate to the URL you uploaded your knowledge base files to in the previous step. The installer will automatically fire up.
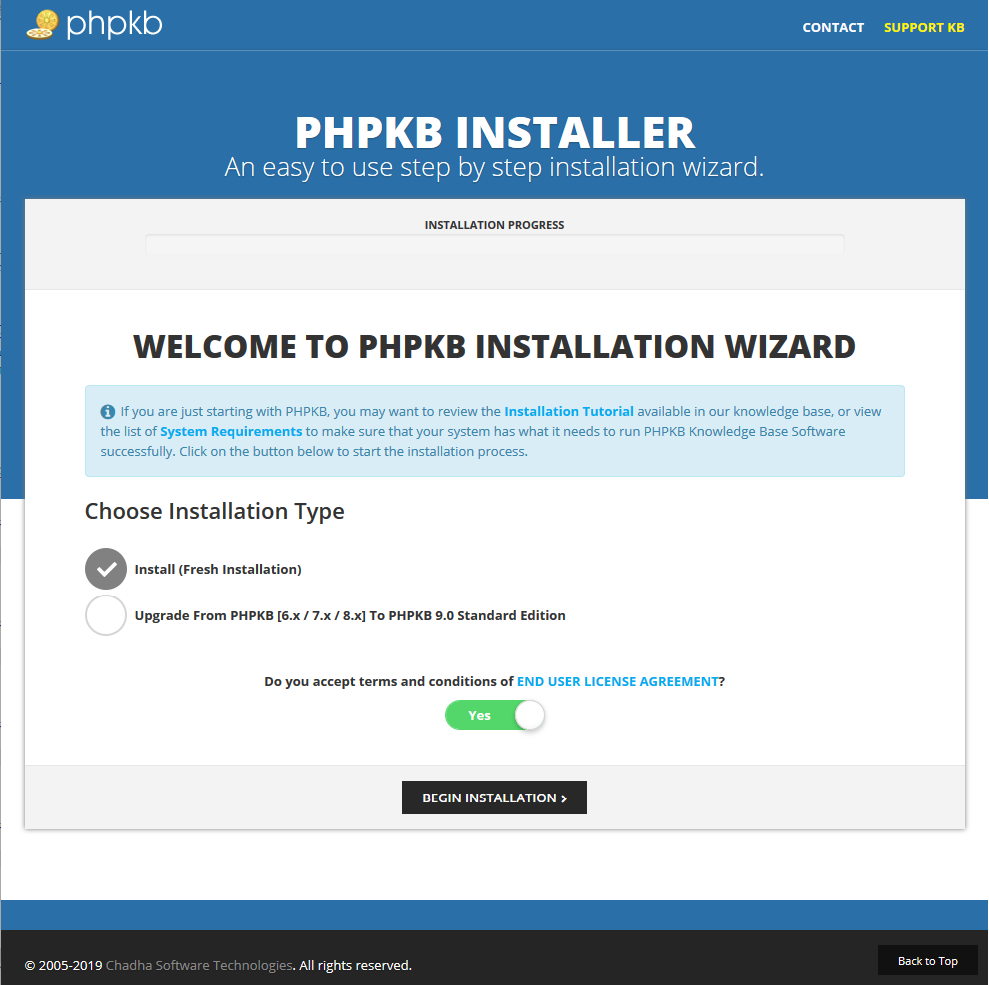
Welcome Screen
Welcome Screen of the installation wizard is purely informative, and it asks you whether you would like to do a fresh install or upgrade your previous knowledge base to the latest version. You should see a "Start Installation" button right away.
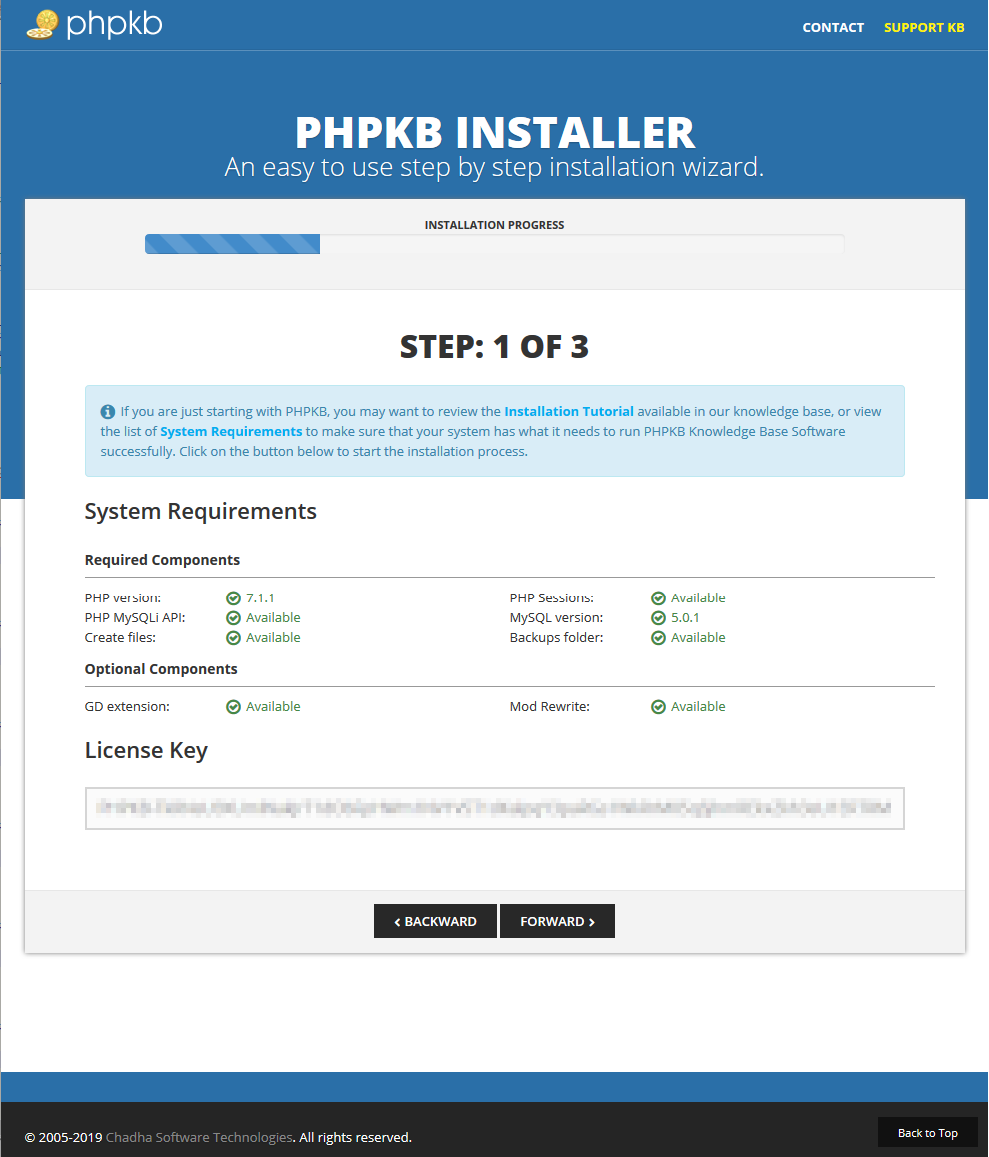
Step 1 - Required Components & License Key
Step one of the installation wizard checks for required components to be installed as well as some optional components. It also performs a file write check to make sure that certain folders have file write permissions. Then it requires you to enter the license key that was received when you purchased the PHPKB knowledge base software.
Step 2 - MySQL Login Details
Step two requires you to enter your MySQL login details. These should be made available to you by your hosting provider or you can use your site admin console (PLESK, cPanel, or whatever your host provides) to create a new database, and if needed, a user account with access to the database. Be sure to include CREATE & ALTER privileges in addition to the standard Select/Insert/Update/Delete permissions for the user on the database.
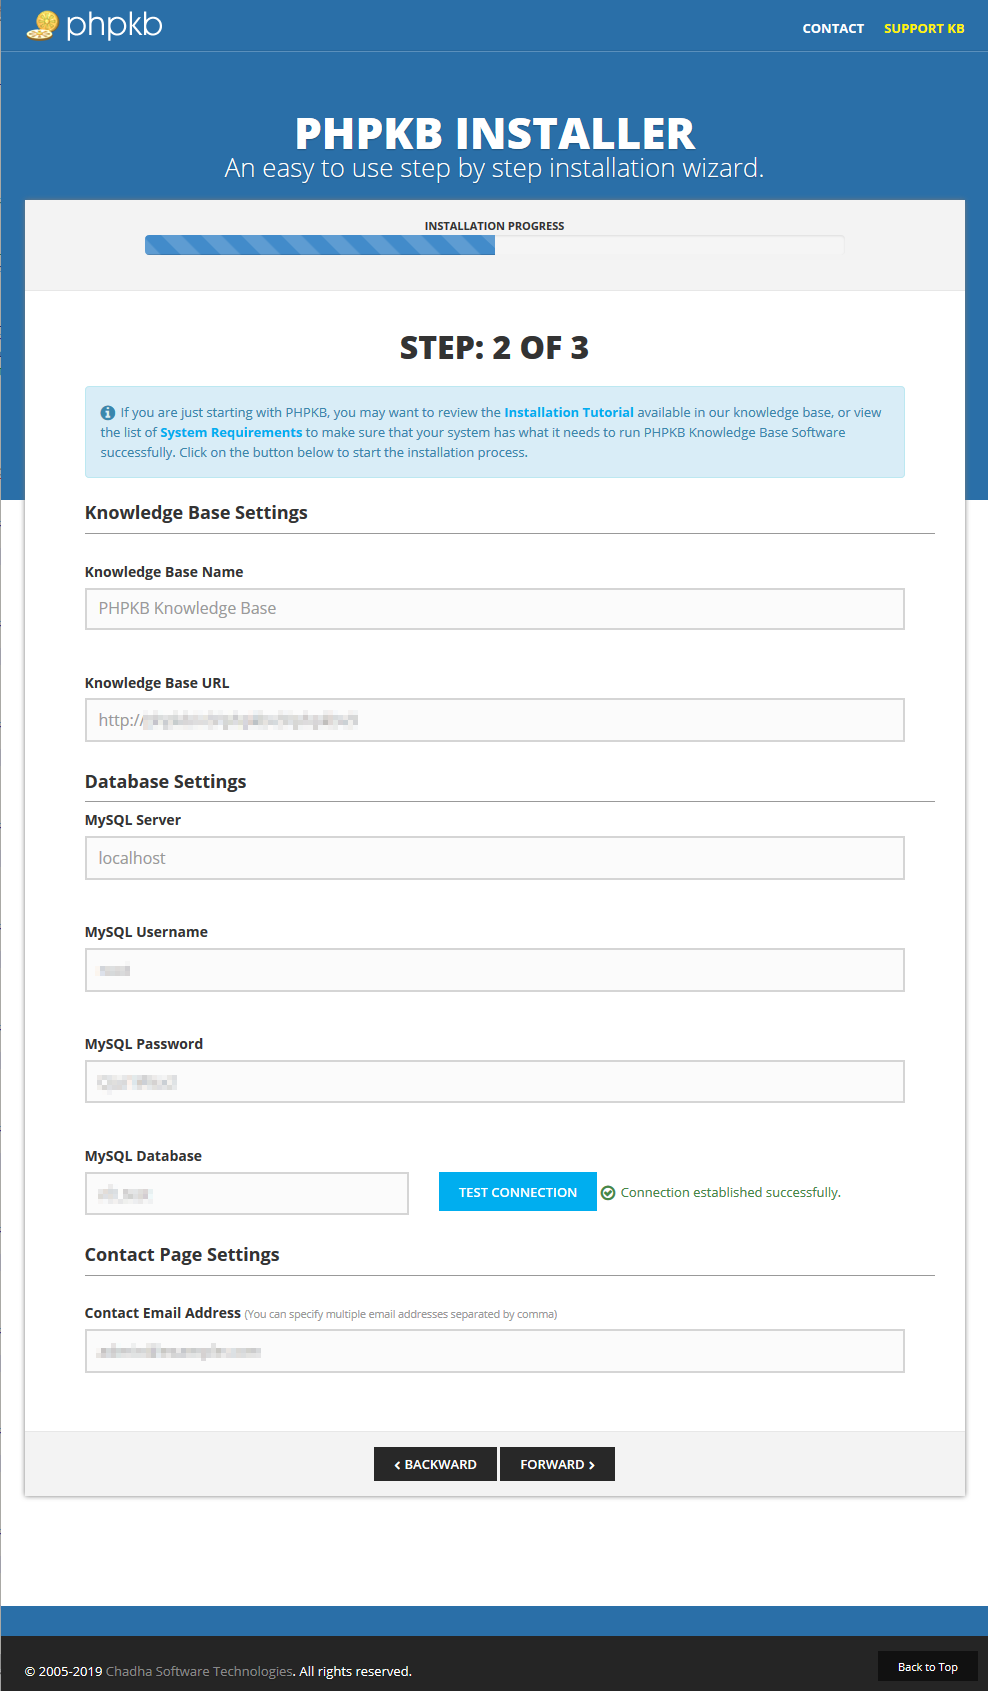
The script will not create any tables at this stage. It will only validate that you’ve filled in the correct data, by opening a test connection to the database.
Step 3 - Account Details
In step three you choose the username and password for the superuser (administrator) account with which you are going to access the admin panel. Choose a secure username and password combination.
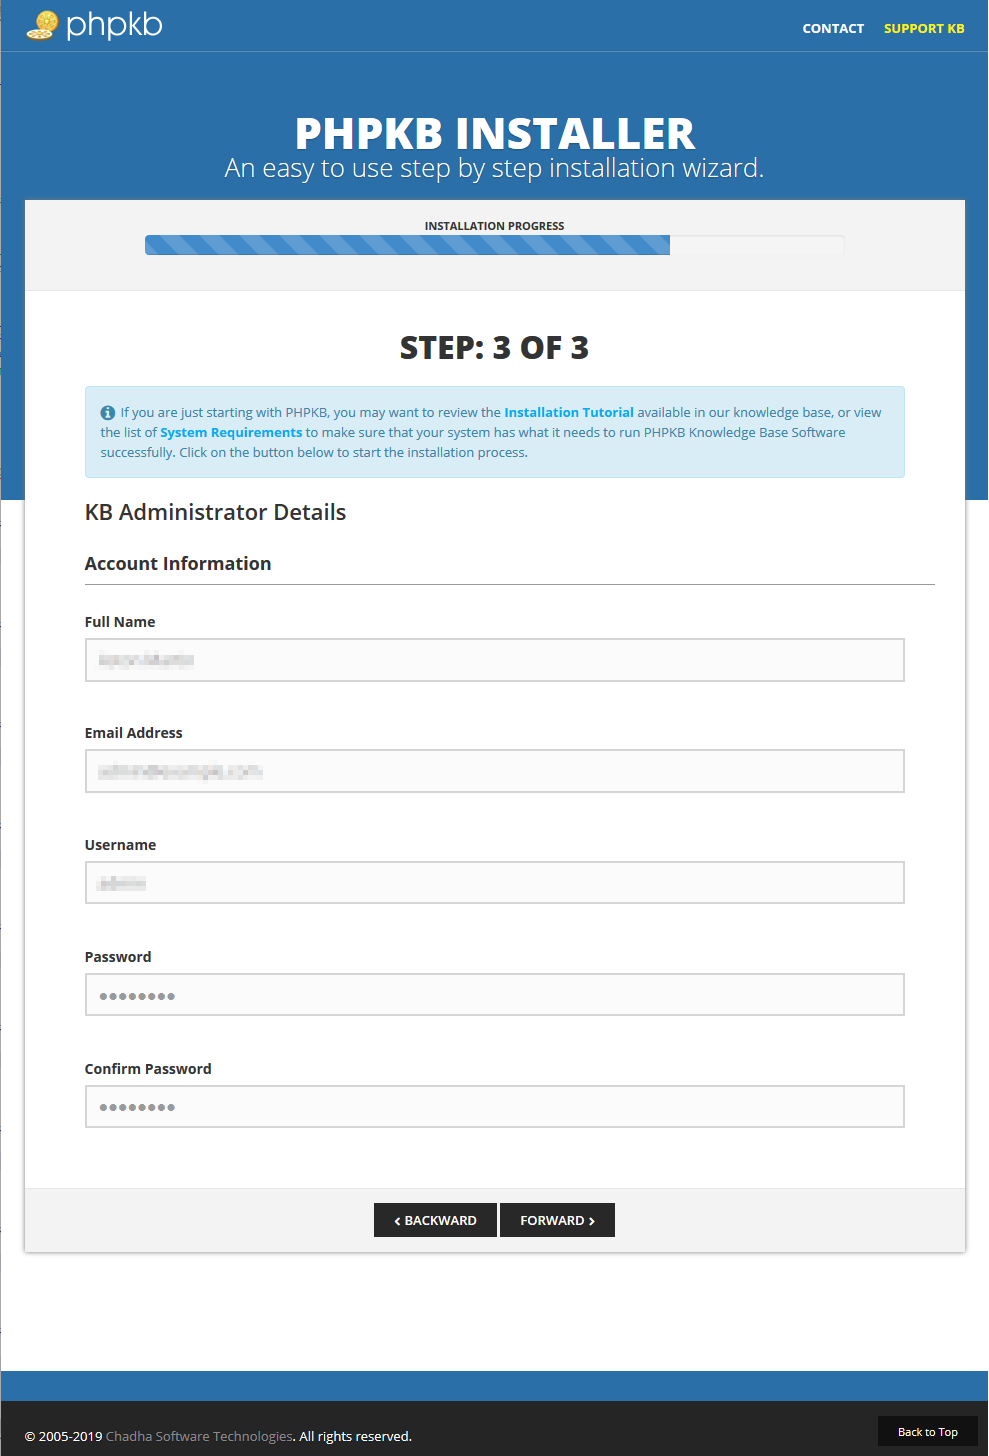
Provide a valid email address at this step, as this is where you are going to receive your "Forgotten password" emails if you happen to need the feature.
You can change your password at any time from the admin control panel of PHPKB knowledge base software, but you cannot change your email or username.
Step 4 - Finishing The Installation
Pressing the "Finish" button will create all the tables in the database, populate them with sample data, and create your admin account.
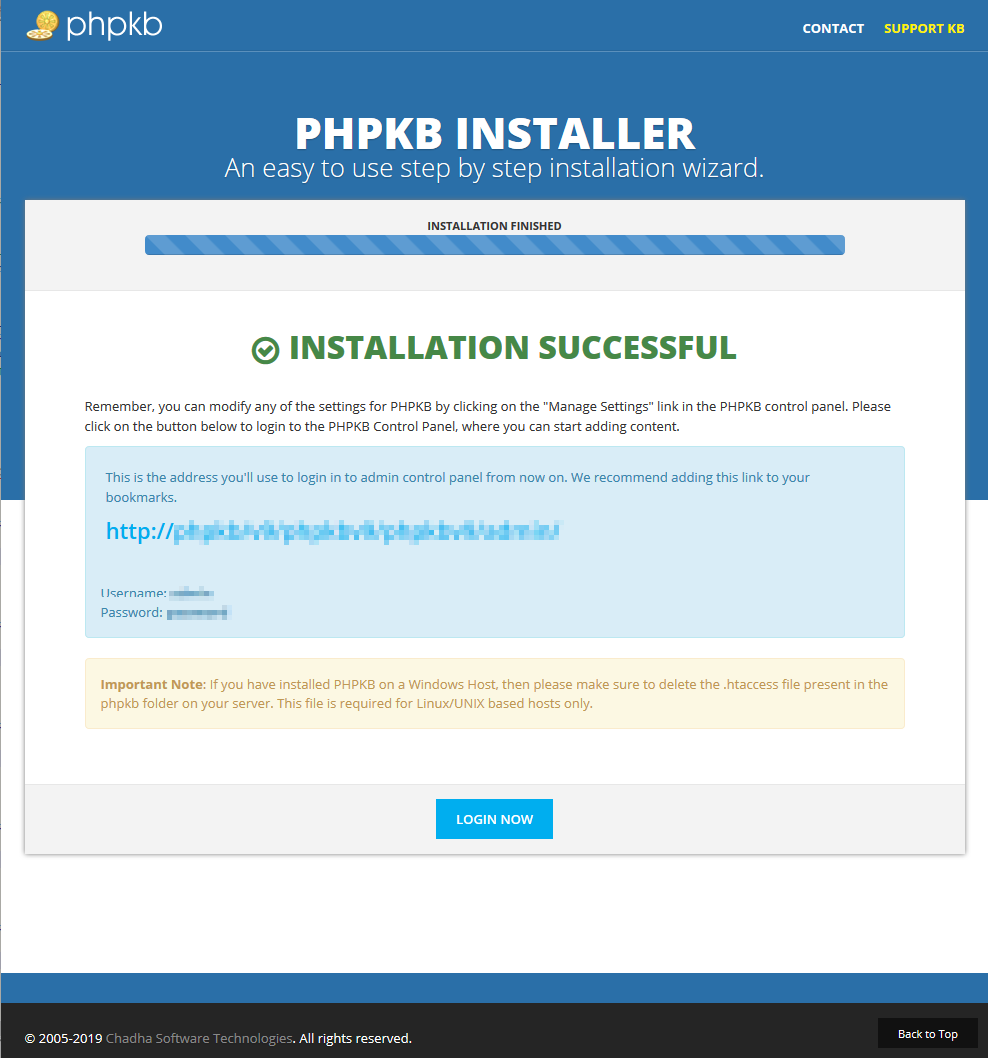
Enjoy your new PHPKB installation!
- Applicable To: Standard Edition, Standard (Multi-Language) Edition, Enterprise Edition (MySQL), Enterprise Multi-Language Edition (MySQL), Enterprise Edition (SQL Server), Enterprise Multi-Language Edition (SQL Server)